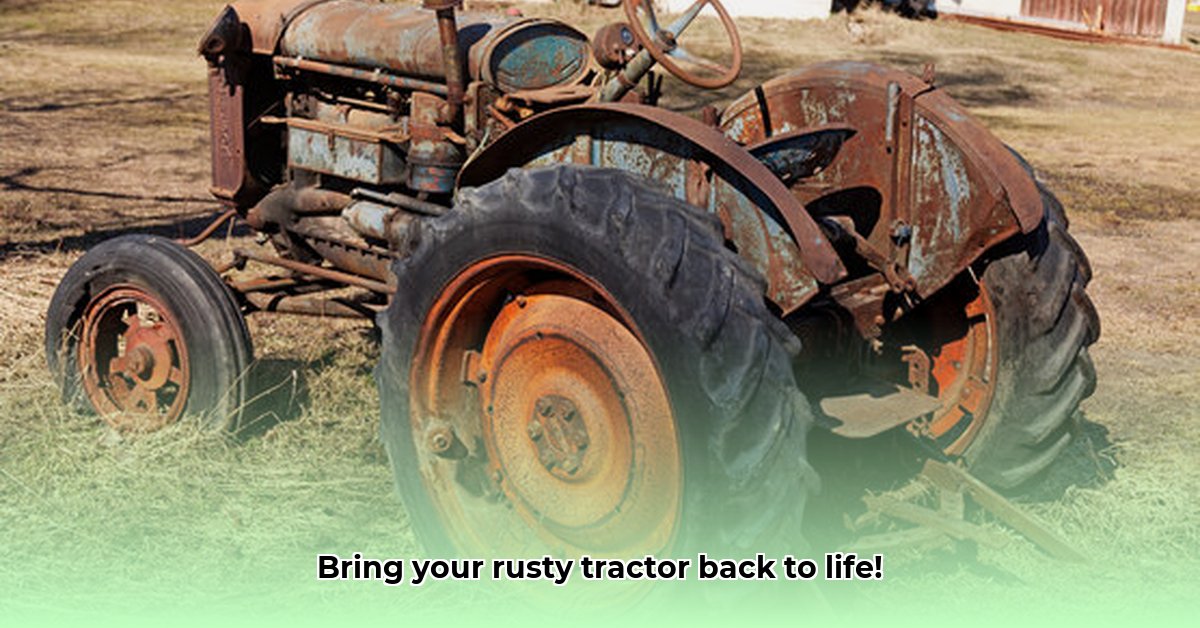
This comprehensive guide will take you through the rewarding journey of restoring your old, rusty tractor. It's more than just a mechanical process; it's a journey of rediscovery, revealing the history and character of a hardworking machine. We'll delve into each stage, combining practical instructions with engaging storytelling to make your restoration project both successful and enjoyable. Get ready to roll up your sleeves and breathe new life into your vintage tractor! For more detailed information, check out this comprehensive guide.
Old Rusty Tractor: A Journey of Restoration
This isn't just about fixing metal; it's about reviving a piece of agricultural history. We'll guide you through the entire restoration process, from initial assessment to the satisfying final test drive. Prepare for some elbow grease, meticulous attention to detail, and the immense satisfaction of bringing a vintage tractor back to life.
Step 1: Assessment and Initial Disassembly
Before you grab any tools, take a good look at your tractor. Where did it come from? What stories does it hold? Document its current state with photographs; these will become invaluable references. Now, begin the careful disassembly, starting with easily accessible components like lights and fenders. Label everything meticulously—this prevents future frustration. Safety first! Rust is sneaky; wear gloves, safety glasses, and a respirator to protect yourself from sharp edges and harmful particles. Remember, proper safety precautions are critical for a successful restoration. Do you know the history of your tractor? Sharing its story adds a compelling narrative to the restoration process.
Step 2: The Parts Hunt – A Real-Life Treasure Hunt
Finding parts for an old tractor often feels like a treasure hunt. First, identify the make, model, and year of your tractor. Original parts are ideal, but reproductions are often more readily available and affordable. Online forums dedicated to vintage tractors are invaluable resources. These communities are a wealth of knowledge and support. Have you tried connecting with online communities of vintage tractor enthusiasts? Their collective experience can be a game-changer. Remember to verify the reputation of online suppliers before purchasing. Sometimes, custom fabrication is necessary – think of this as a hands-on engineering challenge!
Step 3: Cleaning and Restoration of Components - Patience is Key
Cleaning a rusty tractor takes time and patience. It's not just about removing rust – you're uncovering the original metal beneath. You'll need wire brushes, possibly a sandblaster (or a professional sandblasting service), and chemical rust removers. Always prioritize safety. Work in small sections, cleaning each part thoroughly, and assessing the damage. Welding skills might be needed for repairs. Why is a systematic approach crucial in the cleaning phase? A thorough approach ensures a solid foundation for the restoration. Consider outsourcing welding to a professional if you lack experience. After cleaning and repairs, a primer and paint job will protect and enhance the tractor's appearance. Don’t rush; rushing leads to costly mistakes.
Step 4: Reassembly – Like a Giant, Metal Jigsaw Puzzle
Reassembly is the reverse of disassembly, but it's essential to approach it methodically. Refer frequently to your photos and labels. Parts diagrams are also invaluable resources. Precision is crucial; use the correct tools and apply the correct torque to bolts and nuts. Remember, safety is paramount throughout this stage! What are the most important safety precautions when reassembling your tractor? Prioritizing safety ensures a successful and accident-free process.
Step 5: Finishing Touches and the Test Drive
The final phase includes reconnecting electrical systems, thorough testing, and a fresh coat of paint to complete the transformation. Before the test drive, double-check all connections, seals, and fluid levels. Ensure everything is working perfectly before starting the engine. What is the most satisfying element of the entire restoration process? Experiencing the result of your hard work is immensely rewarding. The sense of accomplishment after completing this journey is truly incredible.
Tools and Materials Checklist:
This table provides a comprehensive list of essential tools and materials needed for a successful tractor restoration:
| Category | Items | Important Notes |
|---|---|---|
| Cleaning & Preparation | Wire brushes, sandblaster (optional), rust remover, chemical degreaser | Always prioritize safety: gloves, goggles, respirator are essential. |
| Disassembly/Reassembly | Wrenches (various sizes), sockets, screwdrivers, pullers, torque wrench | Proper tools prevent damage and ensure efficient work. |
| Repair & Fabrication | Welding equipment (or professional welder), grinder, metal stock, filler metal | Consider professional help for complex welding tasks. |
| Painting | Primer (suitable for metal), paint (high-quality, weather-resistant), spray gun, paint thinner | Use products designed for outdoor machinery; proper ventilation is crucial. |
| Safety | Safety glasses, gloves, respirator, work boots | Safety should be your top priority at all times during the restoration. |
How to Source Rare Parts for Vintage Tractor Restoration
Restoring a vintage tractor often involves a quest for hard-to-find parts. This section provides a structured approach to sourcing these crucial components.
Step 1: Comprehensive Assessment
Before sourcing parts, meticulously assess your tractor's needs. Create a detailed list, including photographs of damaged areas. This forms the basis of your search.
Step 2: Exploring Sourcing Avenues
Several avenues for sourcing parts exist:
- Online Marketplaces (eBay, specialized retailers): Exercise caution; verify sellers' reputations.
- Salvage Yards: These can be treasure troves but require patience and thorough searching.
- Vintage Tractor Clubs: Networking with enthusiasts offers invaluable advice and access to parts.
- Auctions: Offers unique opportunities but requires research and careful budgeting.
- Dealerships: Some dealerships might still stock parts for older models.
- Fabrication: A last resort for truly irreplaceable parts, requiring specialized skills and tools.
Step 3: Verifying Part Authenticity
Distinguishing between original and reproduction parts is critical. Look for markings, casting numbers, and materials. Research and online resources, along with expert advice from vintage tractor clubs, can aid in identification.
Step 4: Negotiation and Purchase
While price is a factor, prioritize quality. Don't always opt for the cheapest option; a poorly made reproduction can lead to further complications. Negotiate respectfully but firmly.
Step 5: Detailed Documentation
Keep comprehensive records: parts sourced, costs, and supplier details. This information is valuable for future reference and the broader vintage tractor community.
Restoring a tractor is a journey, not a race. Enjoy the process; the sense of accomplishment is unparalleled. You'll not only restore a machine but also preserve a piece of history – creating your own unique story along the way.